Difference between revisions of "AY Honors/Digital Photography/Answer Key/es"
(Created page with "</noinclude>") |
(Created page with "</noinclude>") |
||
| Line 218: | Line 218: | ||
{{ansreq|page={{#titleparts:{{PAGENAME}}|2|1}}|num=7e}} <!--T:74--> | {{ansreq|page={{#titleparts:{{PAGENAME}}|2|1}}|num=7e}} <!--T:74--> | ||
<noinclude></noinclude> | <noinclude></noinclude> | ||
| − | |||
| − | |||
| − | |||
| − | |||
| − | |||
| − | |||
| − | |||
| − | |||
Another Illustration: If you're taking a picture of a landscape with puffy clouds, take one picture where 2/3 of the picture is composed of the clouds and the landscape fills the bottom 1/3. Then try with 1/3 clouds and 2/3 landscape. Notice how different this same landscape looks with the "3rds" changed from top to bottom! | Another Illustration: If you're taking a picture of a landscape with puffy clouds, take one picture where 2/3 of the picture is composed of the clouds and the landscape fills the bottom 1/3. Then try with 1/3 clouds and 2/3 landscape. Notice how different this same landscape looks with the "3rds" changed from top to bottom! | ||
Revision as of 02:33, 12 January 2021
| Fotografía digital | ||
|---|---|---|
| Asociación General
|
Destreza: 2 Año de introducción: 2006 |
|
Requisitos
|
La especialidad de Fotografía digital es un componente de la Maestría Artesanía. |
This honor has also been adopted by the South Pacific Division with the same requirements but under the name Photography (Digital) 1.
1
1a
1b
1c
1d
2
3
4
5
6
7
(algunos de estos detalles son copiados de la especialidades de Fotografía)
7a
7b
7c
7d
7e
Another Illustration: If you're taking a picture of a landscape with puffy clouds, take one picture where 2/3 of the picture is composed of the clouds and the landscape fills the bottom 1/3. Then try with 1/3 clouds and 2/3 landscape. Notice how different this same landscape looks with the "3rds" changed from top to bottom!
7f
Subjects look different depending on where you are in relation to them when you take the picture.
You'll need three photos for this requirement, though they don't have to be of the same object. A High-angle, Mid-angle, and Low-angle photograph.
High angle means: looking down on your subject
Mid-angle means: looking at your subject straight on.
Low-angle means: looking up at your subject
For this requirement, take a subject, such as some tall straight trees, and take a picture looking straight at them, then another one by laying on the ground looking up through the trees. Did the angle make a difference?
7g
7h
Have you ever taken a picture of a beautiful flower or some animals but when the photo came back, you had to explain to friends "that dot is a pretty rose," and "that dot over there is a buffalo."?
Filling the frame is all about making your subject (what you're taking a picture of) fill up most of the picture frame. This means standing closer to the subject than you're ordinarily used to doing and making sure there's not a lot of "green space" around your subject.
Some ideas for Pathfinders:
- Take a picture of your whole youth group. Be sure there are some standing and some standing/sitting in front of them. Then, get close enough so that there is almost NO "background green space" around them. You'll be impressed with how nice it is to have a photo that shows the expressions on everybody's face.
- Take a picture of your best friend while they're eating at a campout or lockin. Don't try to take a picture of the whole room, but zoom in on their upper body and the top of the table with the plate of food. You'll both laugh when you see the photo that shows how shocked your friend was at your "surprise" picture.
7i
Leading lines are anything in a photograph that will help lead your eyes towards the main subject. For example, do you want people eyes to travel "down the road into the sunset, just like the bus is doing? Or, do you want people to see the big cafeteria on the hill where you and your fellow pathfinders ate all weekend?
Leading Lines also help your photograph's "depth." If your eyes are able to wander into the picture, then your brain will think the picture looks more real, like the real 3-D world we live in.
Ideas for Pathfinders:
- Roads: take a picture of a windy road that leads to nowwhere; The road that leads to camporee or the road into the campsite you're staying at this weekend may also be a good leading line.
- Trails
- Fence Posts / Fence lines
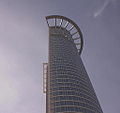
- Tall buildings or tall trees. Take pictures straight up, and use those tall lines to guide your eyes to a Mountain peak, or to the sun / moon shining overhead.
7j
7k
Most flashes should be used no closer to a subject than 6 feet. and more than 20 feet away. Any closer and it will "wash out" your subject, (depending on flash), and any farther away, the light won't even reach. For example: Have you ever seen people use a flash at a football game, or in a large stadium in hopes of getting photos of the people on the field? The flash won't help because its too far away!
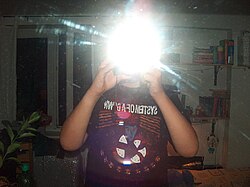
Don't try to use a flash when there is a reflective object directly in front of the lens. For example, a mirror or window behind your friends, or the fishtank glass between you and that shark at SeaWorld. Move off to the side diagonally a little, so that the light, when it flashes off the reflective object, won't bounce directly back to your lens, but instead will bounce into empty space beside you!
Use the flash to fill in shadows. If your subject has side-lighting erasing the features on its face that you want to capture on film, use the flash to erase the shadows. BE SURE you're far enough away, or the whol picture will be blotted out!
Some ideas for Pathfinders:
- Try using a flash when your friends are in a dark cave or room. Arrange them 6 feet away from your camera, then take 2 pictures. One with a flash and one without. Notice the difference. Now take one with your friend(s) only 3 feet away. What happened?
- At your next campout, just before sunset grab some friends and have them stand in front of camp, with the sunlight coming from one side, casting shadows on their faces. Take 2 pictures. One with fill-in flash, and one without. What was the difference?
8
Generally speaking, depending on your version of the presentation software, you follow the menu path: Insert -> Picture -> From File, and navigate to the picture you want to place. After that, you can right click on the picture, and select Format Picture and do some changes.
Do not feel constrained to using PowerPoint. You can download OpenOffice for free from http://www.openoffice.org and use the Impress package that comes with it. Impress can generate slides that PowerPoint can read. OpenOffice is available for Windows, Mac, Linux, and other operating systems.
9
Most modern photo editing software allows you to accomplish these tasks simply and quickly. Adobe's Photoshop is probably the best known photo editing package, but you may wish to experiment with The Gimp. It can be downloaded for free and runs under Windows, Mac, and Linux.
10
11
File - A computer file is a block of arbitrary information, or resource for storing information, just a sequence of binary digits. At a higher level, where the content of the file is being considered, these binary digits may represent integer values or text characters, or anything else. It is up to the program using the file to understand the meaning and internal layout of information in the file and present it to a user as a document, image, song, or program.
Organization - An organization is a social arrangement which pursues collective goals, which controls its own performance, and which has a boundary separating it from its environment. The word itself is derived from the Greek word ὄργανον (organon) meaning tool. The term is used in both daily and scientific English in multiple ways.
Put together, file organization asks that you understand how to organize files on your computer, on the bookshelf, etc. Do you place the files in some sort of established order? Alphabetically, by date? by subject?
References
- Requirements from efiles from Advent Source
- Requirements from PathfindersOnline.org
- Requirements from SPD
- Categoría: Tiene imagen de insignia
- Adventist Youth Honors Answer Book/Honors/es
- Adventist Youth Honors Answer Book/es
- Adventist Youth Honors Answer Book/Skill Level 2/es
- Categoría: Libro de respuestas de especialidades JA/Especialidades introducidas en 2006
- Adventist Youth Honors Answer Book/General Conference/es
- Adventist Youth Honors Answer Book/Arts and Crafts/es
- Adventist Youth Honors Answer Book/Arts and Crafts/Primary/es
- Adventist Youth Honors Answer Book/Artisan Master Award/es
- Adventist Youth Honors Answer Book/Stage 0/es
- Adventist Youth Honors Answer Book


