Difference between revisions of "AY Honors/Wood Handicraft"
Jomegat bot (talk | contribs) m (Fix Tab Name transclusion) |
Jomegat bot (talk | contribs) m (Fix Honor categories) |
||
| Line 6: | Line 6: | ||
|skill=2 | |skill=2 | ||
|year=1938 | |year=1938 | ||
| − | |category=Arts and | + | |category=Arts, Crafts and Hobbies |
|authority=General Conference | |authority=General Conference | ||
|insignia=Wood_Handcraft_Honor.png | |insignia=Wood_Handcraft_Honor.png | ||
Revision as of 16:57, 16 January 2021
Overview
The Challenging Part
The most challenging requirement of this honor is probably this:
8. Make a plaque, tray, notebook cover, or some other useful object in which wood burning is used.
[[AY Honors/Wood Handicraft/Requirements|Tab Name/Printable Version]]
1. Identify at least five common kinds of wood, such as pine, walnut, oak, and cedar.
2. Know the characteristics for the woods identified, and know one use for each example.
3. What is the difference between hard and soft wood?
4. Know how to properly use the following tools in wood handicrafts:
- a. Coping saw
- b. Rasp
- c. Plane
- d. Knife
- e. Chisel
- f. Sanding block
5. Know at least two safety procedures for each of the above tools.
6. Cut out, assemble, and finish animal bookends or doorstop.
7. Cut out and finish a garden stake or lawn marker, using a design such as a child, bird, flower, or tree.
8. Make a plaque, tray, notebook cover, or some other useful object in which wood burning is used.
Printable Answer Key Tab Name/Edit Answer Key
1
Precise identification of wood samples can be very difficult indeed, especially when one considers how many different types of wood there are. For this requirement, it will suffice to bring in five samples and teach the student to distinguish between them. Unless you are already an expert at identifying wood, you would be well served to visit a specialty lumber establishment and ask for a few samples of five species. These types of stores are staffed by extremely knowledgeable people. You may also have luck at a hardware/lumber store such as Lowes or Home Depot. These stores will often display their hardwoods in a different section away from the construction lumber (which is mostly fir and pine). They commonly carry oak, maple, and poplar lumber, and less commonly, cedar. Beech, oak, and luan (a cheap grade of mahogany) are usually available in plywood form. You may also be able to get free samples at a hardwood floor store.
When you have your samples, label them on one side so you can be sure of their identities.
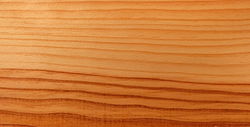
Pine
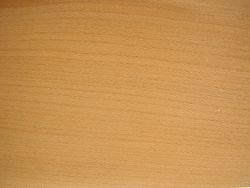
Pines is among the most commercially important genus of tree, valued for its timber and wood pulp throughout the world. Pine wood is widely used in high-value carpentry items such as furniture, window frames, paneling and floors. Pine is readily available at commercial lumberyards, being among the least expensive forms of lumber. Pine is light yellow to white with a reddish tinge. It darkens to an orange tint with age. The wood is soft and easily shaped with both hand and power tools, making it a very popular choice for wood craft.
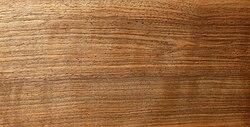
Walnut
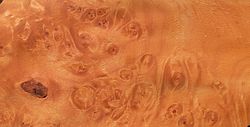
The Persian Walnut, and the Black Walnut and its allies, are important for their attractive timber, which is hard, dense, tight-grained and polishes to a very smooth finish. The colour ranges from creamy white in the sapwood to a dark chocolate colour in the heartwood. When kiln-dried, walnut wood tends toward a dull brown colour, but when air-dried can become a rich purplish-brown. Because of its colour, hardness and grain it is a prized furniture and carving wood. Walnut burls (or 'burrs' in Europe) are commonly used to create bowls and other turned pieces. Veneer sliced from walnut burl is one of the most valuable and highly prized by cabinet makers and prestige car manufacturers.
Walnut is an expensive lumber not usually available at the usual lumberyards (Home Depot, Lowes, etc.). One generally has to buy it at a specialty hardwood lumber store. Look for cabinet or flooring samples.
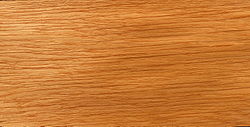
Oak
Oak has very attractive grain markings, particularly when quarter-sawn. Wide, quarter-sawn boards of oak have been prized since the Middle Ages for use in interior paneling of prestigious buildings such as the debating chamber of the British House of Commons in London, England, and in the construction of fine furniture. Today oakwood is still commonly used for furniture making and flooring, timber frame buildings, and for veneer production.
Oak is a very hard, strong, and durable wood. It is not easily worked when cured, and is thus not a good choice for the beginning wood crafter. However, in the hands of a skilled craftsman, it is an excellent choice, holding carving detail well over very long periods of time.
Cedar
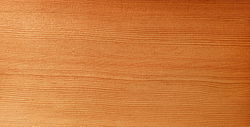
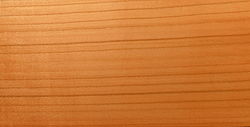
The fine-grained, soft brittle pinkish- to brownish-red heartwood is fragrant, very light and very durable, even in contact with soil. Because of its rot resistance the wood is used for fence posts. Because the aromatic wood is avoided by moths it is in demand as lining for clothes chests and closets, often referred to as cedar closets and cedar chests. It was once a premier wood for pencils.
Cedar is available at some lumberyards, but is often located in a section of the store reserved for outfitting closets. It is more expensive than pine, but not out of reach of the budget-conscious Pathfinder. Its aroma alone make it well worth the added expense compared to pine, and it works just as easily. It is an excellent choice for the beginner.
Maple
Some of the larger maple species have valuable timber, particularly Sugar Maple in North America, and Sycamore Maple in Europe. Sugar Maple wood, often known as "hard maple", is the wood of choice for bowling pins, bowling alley lanes, pool cue shafts, drums, and butcher's blocks. Maple wood is also used for the production of wooden baseball bats, though less often than ash or hickory.
Some maple wood has a highly decorative wood grain, known as flame maple and quilt maple. This condition occurs randomly in individual trees of several species, and often cannot be detected until the wood has been sawn, though it is sometimes visible in the standing tree as a rippled pattern in the bark.
Maple is a very hard wood, and while that makes it difficult to work with hand tools, it also makes it a very good choice when fine carving details are desired. Because of its working difficulty, it is a wood better left to the experienced craftsman rather than the beginner.
Fir
Douglas-fir wood is used for structural applications that are required to withstand high loads. It is used extensively in the construction industry. Like pine and cedar, it is a soft, easily worked wood.
Cherry
Cherry is a beautiful wood highly prized for furniture making. It has a warm brown tone that changes with age to a dark reddish brown. Cherry holds carving details well as it is a hardwood, but it is easier to work than oak, ash, walnut, or maple. Cherry is unlikely to be found in most hardwood/lumber stores, but it is readily available at specialty hardwood outlets. Cherry takes a finish like almost no other wood, providing a rich luster that takes a high polish.
2
The characteristics of each of these woods are described in requirement 1. We list common uses of each below:
- Pine
- Furniture, shelving, flooring
- Walnut
- Furniture, paneling
- Oak
- Furniture, decorative trim (chair rail, molding, stair rails), paneling, beams, flooring, barrels
- Cedar
- Closets, storage chests, plaques
- Maple
- Furniture, flooring, musical instruments (guitars, violins, drums, etc.), butcher blocks
- Fir
- Construction
- Cherry
- Furniture
3
Wood that is produced by cone-bearing trees is classified as softwood. All other wood is classified as hardwood. In general hardwoods are harder than softwoods, but there are many hard softwoods (such as yellow pine and yew), and there are many soft hardwoods (such as balsa). The hardness of the wood is therefore not a reliable indicator of whether a wood is a hardwood or a softwood.
4
4a
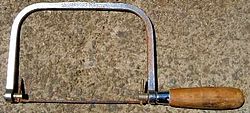
Coping saws are very useful for removing bulk. A carving can often be roughed in with a coping saw, and once the shape is cut out, knives, chisels, and gouges can be used to clean it up and do the final shaping. Coping saw blades can be sharpened with a triangle file, though they are cheap enough that they ore more frequently replaced when dull.
The blade can be installed on the coping saw so that it cuts on either the pull stroke or the push stroke. Experiment to see which you like better. To make a cut, clamp the piece to a bench or hold it firmly with your free hand or knee. Align the blade with the pencil mark you have made which will guide the cut. Gently work the saw up and down to make the cut. You may have difficulty at first, and this does take a little practice to master. But once you have it down, it is not all that difficult. Follow the line until the cut is complete.
4b
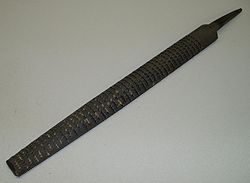
A rasp is a woodworking tool used for shaping wood. It consists of a point or the tip, then a long steel bar or the belly, then the heel or bottom, then the tang. The tang is joined to a handle, usually made of plastic or wood. The bar has had sharp teeth cut into it. Rasps generally cut more coarsely than files. They are useful for rapidly removing wood from curved surfaces. They remove less wood than a drawknife, so they are easier to control. Even though rasps leave very coarse finishes, the cut-away areas can be easily smoothed with finer tools, such as files.
There are several types and shapes of rasps. There is a half round, round and flat. The several types of rasps are bastard, cabinet and wood (finest to coarsest). All these varieties can be used to make different shapes.
A similar tool to a rasp is a surform file; it has coarse, individual teeth like a rasp for cutting wood. The difference being that the surform has a small hole near each of the teeth to allow shavings to pass through and prevent clogging. Surform tools come in different styles and shapes including file-plane, round file and shaping/shaving tools.
4c
A hand plane is a tool for shaping wood. Planes are used to flatten, reduce the thickness of, and impart a smooth surface to a rough piece of lumber.
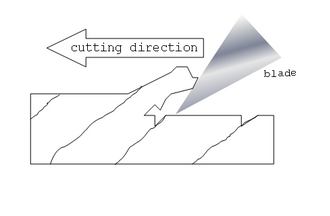
Hand Planes are one of the most satisfying tools to operate. Clamp the wood securely to a bench, and then push the plane along the grain. The blade should be adjusted so that it takes a thin shaving off the plank. A sharp, well adjusted plane will remove a continuous shaving the entire length of the board. Pay attention to how the grain runs - if the grain dives into the board, make sure the plane's blade does not break the shaving off below the surface. If this happens, try planing in the other direction (see illustration).
Once the blade has been removed from a plane, it can be sharpened in the same fashion as a chisel. It should be sharpened frequently, as this will greatly improve its performance.
A plane should be stored on its side to respect the blade. You should also be very careful to not plane into a nail or a screw, as doing so will put a nasty notch in the blade.
4d
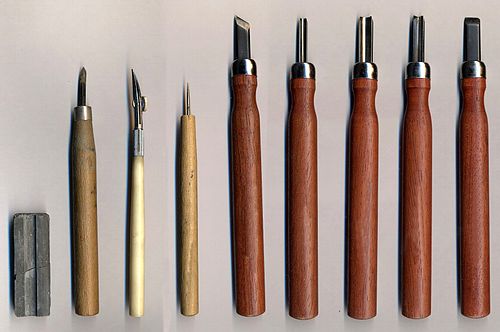
The primary tool for wood carving is a carving knife. You can use a pocket knife as well, and many people do. To sharpen a knife, hold the blade at about a 15° angle and scrape it along a whetstone as if you were trying to shave off a thin layer of the stone. Be sure to sharpen both sides.
4e
A chisel is best used with a mallet. Chisels can be used for removing great quantities of wood. They can cut across the grain or slice along its length. Chisels are sharpened much the same way as knives, but the angle is a bit steeper, ranging from 20° to 35°. Often, they are sharpened at two angles, such as 25° for most of the length of the blade, and 35° near the edge. This allows the blade to be resharpened by only honing a small portion near the cutting edge.
4f
A sanding block is a block used to hold sandpaper. In its simplest form, it is a block of wood or cork with one smooth flat side. The user wraps the sandpaper around the block, and holds it in place. Fancier versions use clips, teeth or clamps to hold the paper in place. Commercial versions can be constructed of various materials. They are usually sized to hold a quarter or half sheet of sandpaper. Some versions use the sandpaper belts intended for a power belt sander. Sanding blocks are helpful because they prevent the "waves" created by plain sandpaper.
5
The main safety rule to follow with any tool is to use common sense.
Coping saw
- Clamp your work firmly to a bench before cutting it with a coping saw. You may wish to pad the clamp with a piece of scrap wood so it does not mar the piece.
- Be careful not to saw into the bench.
- Keep your fingers clear of the blade.
Rasp
- Do not draw the rasp across your skin - it will cut skin even easier than it will cut wood.
- Do not strike a rasp with a hammer or mallet or it may shatter.
Plane
- Do not test the sharpness of a plane's blade by sliding it along a finger.
- Retract the plane blade when storing.
- Keep the blade sharp.
Knife
- Do not push the knife toward another person (or yourself!) when cutting. Imagine the path blade will follow if the item you are cutting suddenly give way, freeing the blade. Always make sure nothing is in that path.
- If you drop a knife, let it fall. Do not try to catch it.
- When handing a knife to another person, offer them the handle - not the blade.
- Do not throw the knife.
- Do not use a locking knife unless the blade is locked.
- For non-locking knives that fold, be aware that it may close on your hand if you apply pressure the wrong way.
- Do not pry with a knife - you may break the blade and cause a piece to go flying.
- Keep the blade sharp. Dull blades are dangerous.
Chisel
- Store the chisel with the blade covered.
- Keep the blade sharp.
- Keep both hands behind the blade.
- Use a mallet with the chisel rather than pushing it along with your hand. This will ensure that your hands are both behind the blade.
- Do not put a chisel in your pocket.
Sanding block
- Do not throw a sanding block
- Pay attention to the path of the sanding block. It is easy to knock something over when you're paying attention to the piece you're sanding instead of the surrounding environment.
- Do not sand skin. Sand paper will abrade skin.
6
Take a piece of wood that is square with a thickness of at least 1/2 inch and draw the animal you want or use carbon paper to trace an existing picture of an animal. Be sure to leave the bottom edge of the board straight, as this will fasten to the flat part of the bookend. Use a coping saw to cut out the animal shape. Sand the board to make it smooth and remove all splinters. Once this part is ready, fasten it to the lower part of the bookend at a 90° angle using two wood screws. The screws should go through the horizontal bottom piece first, and then into the endgrain of the vertical piece (with the animal cut-out). Drill pilot holes before driving the screws or the boards will crack. The diameter of the drill bit should be equal to the diameter of the screw minus the threads. This can be estimated by holding the drill bit behind the screw. The threads should extend past the drill bit, but you should just barely be able to see the drill bit itself. Bore a countersink hole in the underside of the horizontal piece so that the screw will not extend past the surface of the board. When the holes are ready, drive the screws. At this point, you can paint, stain, or varnish the bookend. Once the finish is dry, glue a piece of plastic craft foam or felt to the bottom of the bookend to protect the bookshelf. The foam or felt should create a non-slip surface so the books will not cause the bookend to slide over.
7
Materials that you will need for this project include: 1/4 inch plywood (3 feet square), 1/2 inch block of wood (can be plywood or wood stock),* a coping saw, a sanding block, and any art materials that you wish to use to color the project once you have finished all other steps.*
- Note: Items marked with an "*" are not required for this project. You do not have to paint the project, but it will look much nicer if you do. Also, you can cut the stake part of this project below the design that you select. However, the finished project will not be as sturdy as one that uses the 1/2 inch block of wood.
Take your 1/4 inch plywood and draw (or trace with carbon paper) the design that you wish to use for this project. When you are finished drawing, take a coping saw and cut out your design. If you find that the plywood is tearing out excessively, put the coping saw away and get out a carton knife (or use a hooked blade on a pocket knife). Slice a V-groove around where the saw will cut. This cut should go straight down (90°) along the line, and angle in from the waste side. Next closely examine the teeth of the coping saw, and re-install the blade so that it cuts on the pull stroke rather than on the push stroke. You may notice that a saw always rips out on the side of the board that the cutting stroke exits. By using a knife to cut out around the line, there is nothing to tear out, but this only works if the blade cuts on the pull stroke.
Then, sand the edges gently to remove the excess wood particles that make the design rough and unfinished. Next, take your 1/2 inch block of wood and cut it to about 18 inches in length and cut one end to a point (it is best to make a 45 degree cut from both sides of the stake). Now, attach your design to the stake using wood glue, finishing nails, or wood screws.
- Note: If you are making the entire project from the 1/4 inch plywood, the stake extends from the bottom of the design anywhere from 12-18 inches. Do not cut the stake out separately, but cut down beyond the design to make the stake.
Finally, you may decorate your project with paint, if you wish. It would be best to put a water sealant on your project before placing it outside so that rain will not ruin it.
8
Woodburning is the art of decorating wood or other materials with burn marks resulting from the controlled application of a heated object such as a poker. It is also known as pokerwork or pyrography.
Pyrography means "writing with fire" and is the traditional art of using a heated tip or wire to burn or scorch designs onto natural materials such as wood or leather. Burning can be done by means of a modern solid-point tool (similar to a soldering iron) or hot wire tool, or a more basic method using a metal implement heated in a fire, or even sunlight concentrated with a magnifying lens.
This allows a great range of natural tones and shades to be achieved - beautiful subtle effects can create a picture in sepia tones, or strong dark strokes can make a bold, dramatic design. Varying the type of tip used, the temperature, or the way the iron is applied to the material all create different effects. Solid-point machines offer a variety of tip shapes, and can also be used for "branding" the wood or leather. Wire-point machines allow the artist to shape the wire into a variety of configurations, to achieve broad marks or fine lines. This work is time-consuming, done entirely by hand, with each line of a complex design drawn individually. After the design is burned in, wooden objects are often colored, sometimes boldly or more delicately tinted.
Light-colored hardwoods such as sycamore, beech and birch are most commonly used, as their fine grain is not obtrusive, and they produce the most pleasing contrast. However, other woods, such as pine or oak, are also used when required.
By far, the easiest option for meeting this requirement is to decorate a plaque. Blank, unfinished wooden plaques are readily available at craft stores. Begin by drawing your design on the wood with a pencil. You can then proceed to burn your design into the wood with the wood burning tool or with the sun and a magnifying glass. Choose a simple design for your first attempt, as this technique requires patience and persistence. Once the design is burned into the wood, it can be finished with varnish, tung oil, or lacquer.
The South American Division has developed an honor called Pyrography which is specifically about wood burning. Keep in mind, however, the patch token will not be easy to attain for anyone outside of that division.
References
Content on this wiki is generated by people like you, and no one has created a lesson plan for this honor yet. You could do that and make the world a better place.
See AY Honors/Model Lesson Plan if you need ideas for creating one.
