Difference between revisions of "AY Honors/Woodworking Tools/Coping saw"
m (W126jep moved page AY Honors/Woodworking Tools/Coping saw to AY Honors/Woodworking Tools/Coping saw) |
m |
||
| Line 4: | Line 4: | ||
The blade can be installed on the coping saw so that it cuts on either the pull stroke or the push stroke. Experiment to see which you like better. To make a cut, clamp the piece to a bench or hold it firmly with your free hand or knee. Align the blade with the pencil mark you have made which will guide the cut. Gently work the saw up and down to make the cut. You may have difficulty at first, and this does take a little practice to master. But once you have it down, it is not all that difficult. Follow the line until the cut is complete. | The blade can be installed on the coping saw so that it cuts on either the pull stroke or the push stroke. Experiment to see which you like better. To make a cut, clamp the piece to a bench or hold it firmly with your free hand or knee. Align the blade with the pencil mark you have made which will guide the cut. Gently work the saw up and down to make the cut. You may have difficulty at first, and this does take a little practice to master. But once you have it down, it is not all that difficult. Follow the line until the cut is complete. | ||
<br style="clear:both"> | <br style="clear:both"> | ||
| − | |||
| − | |||
Latest revision as of 04:10, 15 July 2022
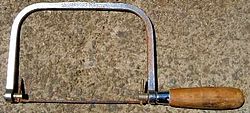
Coping saws are very useful for removing bulk. A carving can often be roughed in with a coping saw, and once the shape is cut out, knives, chisels, and gouges can be used to clean it up and do the final shaping. Coping saw blades can be sharpened with a triangle file, though they are cheap enough that they ore more frequently replaced when dull.
The blade can be installed on the coping saw so that it cuts on either the pull stroke or the push stroke. Experiment to see which you like better. To make a cut, clamp the piece to a bench or hold it firmly with your free hand or knee. Align the blade with the pencil mark you have made which will guide the cut. Gently work the saw up and down to make the cut. You may have difficulty at first, and this does take a little practice to master. But once you have it down, it is not all that difficult. Follow the line until the cut is complete.

