Translations:Adventist Youth Honors Answer Book/Vocational/Masonry/60/en
Installing the Closure Block
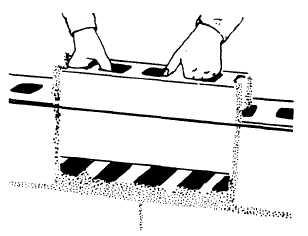
Fifth and last, before installing the closure block, butter both edges of the opening and all four vertical edges of the closure block with mortar. Then, lower the closure block carefully into place (figure 20). If any mortar falls out, leaving an open joint, remove the block and repeat the procedure. To assure a good bond, do not spread mortar too far ahead when actually laying blocks. If you do, the mortar will stiffen and lose its plasticity. The recommended width of mortar joints for concrete masonry units is 3/8 inch. When properly made, these joints produce a weathertight, neat, and durable concrete masonry wall.
As you lay each block, cut off excess mortar from the joints using a trowel (figure 21) and throw it back on the mortar board to rework into the fresh mortar. Do not, however, rework any mortar dropped on the scaffold or floor. Weathertight joints and the neat appearance of concrete masonry walls depend on proper striking (tooling). After laying a section of the wall, tool the mortar joint when the mortar becomes “thumb print” hard. Tooling compacts the mortar and forces it tightly against the masonry on each side of the joint. Use either concave or V-shaped tooling on all joints (figure 22).


