Especialidades JA/Orientación/Respuestas
| Orientación | ||
|---|---|---|
| Asociación General
|
Destreza: 2 Año de introducción: 1956 |
 |
Requisitos
Template:Division variant (GC)/es
|
La especialidad de Orientación es un componente de la Maestría Vida Primitiva. |
|
La especialidad de Orientación es un componente de la Maestría Recreación. |
|
|
Para esta especialidad, necesitará una brújula militar como la del enlace hacia Amazon. También necesitará mapas topográficas que se pueden descargar gratuitamente o se pueden comprar.
1
2
These symbols are used by the U.S. National Park Service:

Airport

Boat launch

Campground

Canoe access

Drinking water

First aid

Fishing

Food service

Four-wheel drive access

Gas station

Hospital

Information

Litter receptacle

Lodging

Parking area

Picnic area

Ranger station

Recycling

Restrooms

RV campground

Self-guiding trail

Shelter

Store

Telephone

Trailhead

Bridge

Hiking trail
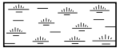
Marsh

Parking area
Rapids

Spring

Unpaved road


3

The lensatic compass consists of three major parts: the cover, the base, and the lens.
4
4a
4b
4c
4d
4e
4f
4g
4h
True North is the direction from any point on the Earth's surface to the Geographic North Pole.
4i
The azimuth is a compass bearing expressed in degrees. There are 360° in a circle, and North is, by convention, 0° (or 360°). East is 90°, South is 180°, and West is 270°. While azimuth expresses the compass bearing in the direction of interest, the Back Azimuth expresses the compass bearing in exactly the opposite direction. In other words, azimuth is the direction to which you are going, and back azimuth is the direction from which you are coming. The back azimuth can be calculated by adding or subtracting 180° from the azimuth. Add if the azimuth is less than 180°, otherwise subtract.
4j
Distance is the measure of length, or how far apart two points are away from each other.
4k
The surface of the earth; the outer crust of the globe, or some indefinite portion of it.
5
The techniques employed to find the magnetic azimuth when using the lensatic compass are as follows:
Using the Centerhold Technique

First, open the compass to its fullest so that the cover forms a straightedge with the base. Move the lens (rear sight) to the rearmost position, allowing the dial to float freely. Next, place your thumb through the thumb loop, form a steady base with your third and fourth fingers, and extend your index finger along the side of the compass. Place the thumb of the other hand between the lens (rear sight) and the bezel ring; extend the index finger along the remaining side of the compass, and the remaining fingers around the fingers of the other hand. Pull your elbows firmly into your sides; this will place the compass between your chin and your belt. To measure an azimuth, simply turn your entire body toward the object, pointing the compass cover directly at the object. Once you are pointing at the object, look down and read the azimuth from beneath the fixed black index line. This preferred method offers the following advantages over the sighting technique:
- It is faster and easier to use.
- It can be used under all conditions of visibility.
- It can be used when navigating over any type of terrain.
- It can be used without putting down other gear; however, any other gear must be slung back out of the way.
- It can be used without removing eyeglasses.
Using the Compass-to-Cheek Technique

The compass-to-cheek technique is used almost exclusively for sighting, and it is the best technique for this purpose.
Fold the cover of the compass containing the sighting wire to a vertical position; then fold the rear sight slightly forward. Look through the rear-sight slot and align the front-sight hairline with the desired object in the distance. Then glance down at the dial through the eye lens to read the azimuth.
6

Although different models of the lensatic compass vary somewhat in the details of their use, the principles are the same.
- Hold the compass level in the palm of the hand.
- Rotate it until the desired azimuth falls under the fixed black index line (for example, 320°), maintaining the azimuth as prescribed.
- Turn the bezel ring until the luminous line is aligned with the north-seeking arrow. Once the alignment is obtained, the compass is preset.
- To follow an azimuth, assume the centerhold technique and turn your body until the north-seeking arrow is aligned with the luminous line. Then proceed forward in the direction of the front cover's sighting wire, which is aligned with the fixed black index line that contains the desired azimuth.
7
Method #1
(These directions assume your orienting arrow lines up with the North indicator on your compass dial, meaning the compass has not been adjusted for declination).
A) Obtain the local magnetic declination for the area represented on your map. At the bottom of every USGS map is a diagram that displays the difference & direction between true north (represented as a star), grid north (abbreviated as “GN”), and magnetic north (abbreviated as “MN”). Magnetic declination is the number of degrees and direction between true north and magnetic north. Because declination varies over time, it is advisable to get a reasonably current figure. If your USGS map is more than 15 years old (the declination date appears in the diagram), here’s an easy-to-use website that gives you only the information you need for your specific area:
http://geomag.nrcan.gc.ca/apps/mdcal-eng.php
If magnetic north is east of true north, the local declination is positive.
If magnetic north is west of true north, the local declination is negative.
B) Draw a line on the map that connects your starting point with the destination (your “map bearing”). Extend the line all the way through the map border (the “neat line”).
C) Distance yourself from any nearby metal such as keys, belt buckle, desk, car, fence, etc. Place the compass on the map so the needle’s pivot point is directly over the intersection of your map bearing and neat line.
D) Rotate the dial until compass ring north agrees with map north. Read your map bearing from the compass dial. Make sure the bearing agrees with your direction of travel – for example, if you intend to travel due east, the bearing is 90 degrees, not 270 degrees.
E) Do this step mentally – don’t turn the compass dial. If the local declination is positive, then subtract the declination amount from the bearing you just derived. If the local declination is negative, then add the declination amount to the bearing you just derived.
F) Turn the compass dial until the figure you calculated in step E lines up with the index line.
G) Lift the compass off the map, and with the direction of travel arrow pointing directly away from you, rotate your body and the compass all in one motion until the red magnetic needle overlays the orienting arrow.
H) Sight a landmark along this bearing, and proceed to it. Repeat this step until you reach your destination.
Method #2:
(These directions assume your orienting arrow lines up with the North indicator on your compass dial, meaning the compass has not been adjusted for declination).
A) Obtain the local magnetic declination for the area represented on your map. At the bottom of every USGS map is a diagram that displays the difference & direction between true north (represented as a star), grid north (abbreviated as “GN”), and magnetic north (abbreviated as “MN”). Magnetic declination is the number of degrees and direction between true north and magnetic north. Because declination varies over time, it is advisable to get a reasonably current figure. If your USGS map is more than 15 years old (the declination date appears in the diagram), here’s an easy-to-use website that gives you only the information you need:
http://geomag.nrcan.gc.ca/apps/mdcal-eng.php
If magnetic north is east of true north, the local declination is positive
If magnetic north is west of true north, the local declination is negative.
B) Draw a line on the map that connects your starting point with the destination (your “map bearing”).
C) Distance yourself from any nearby metal such as keys, belt buckle, desk, car, fence etc.
D) Place the compass on the map so the baseplate is parallel to the line you drew. Make sure the direction of travel arrow points to your destination.
E) Rotate the dial until compass ring north agrees with map north. Do not move the compass when you rotate the dial.
F) Remove the compass from the map and, with the direction of travel arrow pointing directly away from you, rotate your body and the compass all in one motion until the red magnetic needle overlays the orienting arrow.
G) If local declination is positive, then subtract the declination amount (turn the dial clockwise). If local declination is negative, then add the declination amount (turn the dial counter-clockwise).
H) Again, with the direction of travel arrow pointing directly away from you, rotate your body and compass all in one motion until the red magnetic needle overlays the orienting arrow. Sight a landmark along this direction of travel and proceed to it. Repeat this step until you reach your destination.
Adjustable Declination Compasses:
A compass with adjustable declination allows you to rotate the orienting arrow independently of the compass dial. If you have such a compass, you may calculate your map bearing without adding or subtracting the amount of local magnetic declination. To calibrate your compass in this fashion, rotate the inner liquid capsule (or turn the screw with the key) until the orienting arrow deviates from the compass ring’s north indicator by the amount & direction of the local magnetic declination. For example, if local declination is 10 degrees east of true north, rotate the inner liquid capsule (or turn the screw with the key) until the orienting arrow points to 10 degrees east. If using Method #1, you do not need to add or subtract as indicated in step E; just make sure compass ring north (not the orienting arrow) agrees with map north as directed in step D If using Method #2, skip steps G and H; again, be sure compass ring north (not the orienting arrow) agrees with map north as directed in step E.
Magnetic Declination Varies Considerably Across The United States
The magnetic needle in a compass is attracted by the magnetism of the Earth, and therefore always points to the constantly shifting Magnetic North Pole. The Geographic North Pole is static and is located about 1200 miles north of the Magnetic Pole. Maps and directions are usually oriented toward the Geographic Pole, also referred to as "True North."
Magnetic declination is the direction and amount of variation between the Magnetic Pole and True North. The amount and direction of declination depends upon how those two poles align relative to a given point on Earth. When the two poles align, declination is zero, and the line of zero declination is termed the agonic line. At points west of the agonic line, a magnetic needle will point east of true north (positive declination). At points east of the agonic line, a magnetic needle will point west of true north (negative declination). There is a pattern, but it does not follow meridians or parallels. Isogonic lines are like magnetic contour lines -they trace a path of constant magnetic declination.

8
Place the compass on the map so the baseplate parallels the north-to-south map neat line. Rotate the dial until compass ring North agrees with map North. Add or subtract the amount needed to adjust for local magnetic declination (subtract if local declination is positive, add if local declination is negative); if your adjustable declination compass is already calibrated for local declination, you don’t need to add or subtract, just make sure compass ring North (not the orienting arrow) agrees with map North. Holding the map and compass steadily (the baseplate should still be on the north-to-south map neat line), rotate the map and compass all in one motion until the red magnetic needle overlays the orienting arrow. Again, make sure there is no interference from metal when you perform this (ex: rebar in concrete). Your map and your compass are now oriented to true north. Compare the physical features around you with your map to help derive your location on the map..
9
Resection is a method of using a compass and a map to determine your current position. The first step is to find a feature of the landscape that you can also identify on the map. This could be a mountain peak, an intersection, a bridge, or even a utility pole (some topographic maps mark where high-voltage lines are, as well as the position of the poles that hold them up). The closer these two landmarks are to 90° offset from one another, the more accurate the resection will be. For instance, if the first landmark is at 115°, choose the second one as close to either 205° (115°+90°) or 25° (115°-90°) as you can. This is not a hard and fast rule, and the prominence of the landmark may well be more important than the 90° offset. Once you have shot an azimuth to the first landmark, calculate the back azimuth, and plot a line on your map from the landmark towards (and past) your current position (which should be somewhere on that line). Be sure to correct for declination when plotting this line. Then shoot the azimuth of the second landmark, and plot it's back azimuth on the map as well, again correcting for declination. If your readings are accurate and your plotting was done carefully, your current position should be very close to where these two lines intersect.
10
References
- Answer to requirements 5 and 6 were adapted from the U.S. Army Field Manual FM 3-25.26
- Answers to requirement 7 and 8 were taken verbatim from http://education.usgs.gov/common/lessons/how_to_use_a_compass_with_a_usgs_topographic_map.html
- Categoría: Tiene imagen de insignia
- Adventist Youth Honors Answer Book/Honors/es
- Adventist Youth Honors Answer Book/es
- Adventist Youth Honors Answer Book/Skill Level 2/es
- Categoría: Libro de respuestas de especialidades JA/Especialidades introducidas en 1956
- Adventist Youth Honors Answer Book/General Conference/es
- Adventist Youth Honors Answer Book/Unknown/es
- Adventist Youth Honors Answer Book/Unknown/Primary/es
- Adventist Youth Honors Answer Book/Stage 0/es
- Adventist Youth Honors Answer Book/Wilderness Master Award/es
- Adventist Youth Honors Answer Book/Recreation Master Award/es
- Adventist Youth Honors Answer Book/IAConnection/es
