Translations:AY Honors/Māori Lore/Answer Key 2/96/en
From Pathfinder Wiki
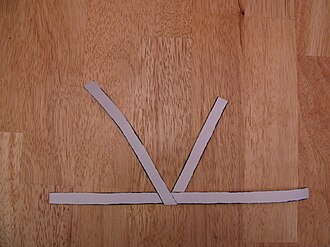
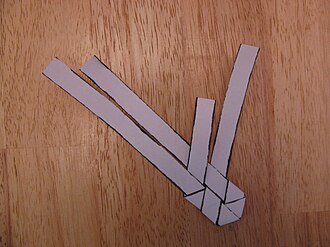
| Mark a 60° angle on one strip, not in the center, but off to either side. Fold the strip into a V along the 60° line with the left side over the right. This angle is critical, so make it as close to 60° as you can. Place a second strip in the bottom of the V as shown, but do not center it in the notch of the V. If you make the V fold in the center or center the second strip on the notch, the two ends of the strip will run out at the same time and you will have two splices in the same vicinity. Offsetting them from the center avoids this problem. |
| Fold the right side of the horizontal strip behind the right leg of the V so that it lies parallel to the left leg of the V. If the 60° angle was folded properly, the second strip should fall right into place. If it does not, check the angle of that first fold again. |
|
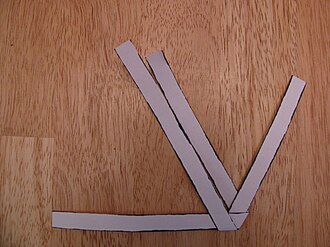
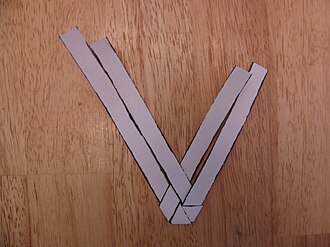
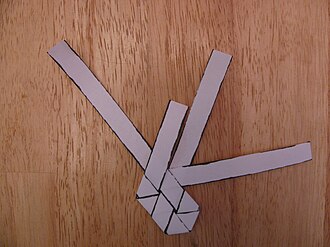
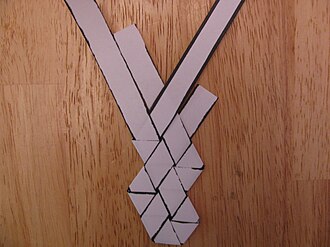
Fold the other horizontal strip over the left leg of the V so that it runs along and parallel to the right leg of the V. Tuck it beneath the second strip it crosses. You should end up with a double-V, consisting of two outer legs and two inner. The rest of the weaving process will always begin with one of the outer legs. Choosing which is perhaps the most difficult part of making a tipare, but for now, choose the one on the right and fold it behind the V as shown on the right. Make sure that it goes behind two strips and over the third. |
| Now take that same strip and fold it around the back of the strip it was just tucked in front of. Weave it in front of the adjacent strip. |
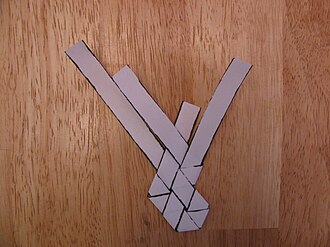
| Fold the strip farthest to the left behind the tipare, and weave it in front of the strip farthest to the right. |
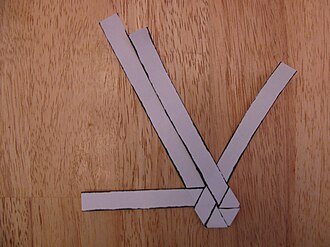
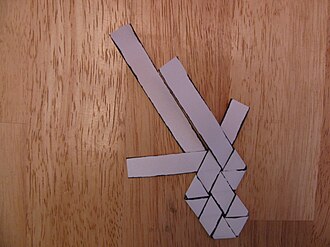
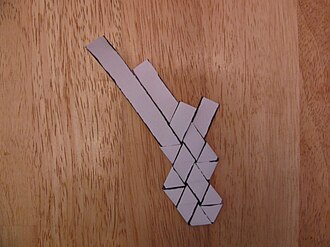
| Fold that same strip behind the right-most strip and weave it in front of the next. The next step is to take one of the outer strips and fold it into a horizontal position, but which strip? As you make a tipare, this will be the question that vexes you after every fold, and if you get it wrong, the tipare will come out wrong as well. Look at the photo to the left. If you fold the strip on the left, you will continue the edge made along the left side. If you fold the strip on the right, you will form a point on the right side. Always choose the strip that will form a point. |
| There — we have chosen the strip that will form a point and have folded it horizontally. It was woven over the front of the outer strip on the other side and then folded around it and woven again. |
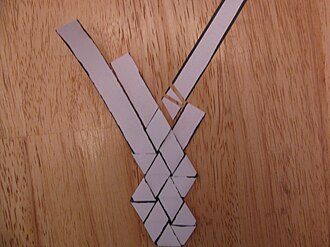
| But now we've run out of strip. Cut the strip along the edge of the tipare, and cut the tip of a new strip off at the same angle. The ends of these two strips are positioned next to the pieces from which they were cut. Discard them. |
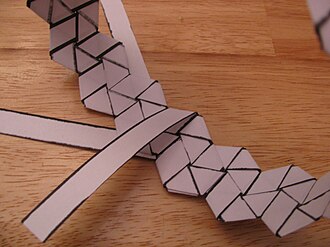
| Now tuck the new strip into the weave, pushing it in until it stops. You should be able to push it in pretty far. There is no need for glue or any other sort of adhesive. The weave itself will hold the strip in place. Continue weaving until you have a long enough piece of tipare to wrap around the head of the intended tipare wearer. |
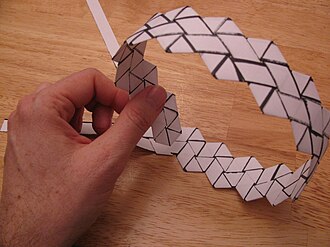
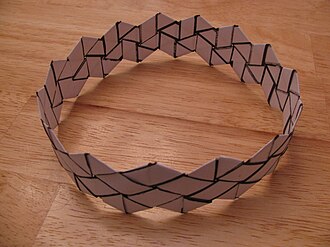
| Bend the tipare around forming a loop. Line up the beginning of the tipare with the points on the unwoven end (photo on the left). Fold the next strip on the unwoven end around the beginning, cut it to length, and tuck it into the weave (photo on the right). |
| Continue weaving the loose ends into the tipare, cutting them off at the proper length and tucking them into the weave. When the last strip is woven into place, the tipare is finished. Crown the recipient. |
