Difference between revisions of "AY Honors/Springboard Diving/Answer Key 2/en"
(Updating to match new version of source page) |
(Updating to match new version of source page) |
||
| Line 1: | Line 1: | ||
| − | + | {{HonorSubpage}} | |
<noinclude></noinclude> | <noinclude></noinclude> | ||
| − | |||
| − | |||
| − | |||
| − | |||
| − | |||
| − | |||
| − | |||
| − | |||
| − | |||
| − | |||
| − | |||
{{division variant|division=General Conference}} | {{division variant|division=General Conference}} | ||
| − | + | <noinclude></noinclude> | |
<!--{{Honor_Master|honor=Springboard Diving|master=Aquatic}}--> | <!--{{Honor_Master|honor=Springboard Diving|master=Aquatic}}--> | ||
| − | |||
| − | |||
| − | |||
| − | |||
| − | |||
{{honor_prerequisite|category=Recreation|honor=Swimming_-_Beginner_-_Advanced}} | {{honor_prerequisite|category=Recreation|honor=Swimming_-_Beginner_-_Advanced}} | ||
| − | |||
| − | |||
| − | |||
<section begin="Body" /> | <section begin="Body" /> | ||
{{ansreq|page={{#titleparts:{{PAGENAME}}|2|1}}|num=1}} | {{ansreq|page={{#titleparts:{{PAGENAME}}|2|1}}|num=1}} | ||
<noinclude></noinclude> | <noinclude></noinclude> | ||
| − | <!-- 1. Demonstrate the following dives: a. Swan | + | <!-- 1. Demonstrate the following dives: a. Swan b. Front somersault (tuck) c. Half twist --> |
<noinclude></noinclude> | <noinclude></noinclude> | ||
| Line 38: | Line 19: | ||
[http://www.wikihow.com/Do-a-Swan-Dive-From-the-Side-of-a-Swimming-Pool Source] | [http://www.wikihow.com/Do-a-Swan-Dive-From-the-Side-of-a-Swimming-Pool Source] | ||
| − | # | + | # Distance yourself. One step should do it. You need enough room to build up enough momentum, but if you run then you will probably slip. |
| − | # | + | # Check the depth of the pool. Only swan-dive in the deepest end reachable, as the swan-dive will take you very deep very quickly. |
| − | # | + | # Put your strongest leg forward. Your toes should be just hanging over the edge of the pool. Your other leg can be next to it or several inches behind, it depends on your preferences. |
| − | # | + | # Spread your arms to your side. This is essential for later. |
| − | # | + | # Push off from the side of the pool. Be sure to push slightly up, too. Snap your legs together tightly and lean forward when you do. Your body should be slightly bent.<br> |
| − | # | + | # Force your arms forward so your body is in a pencil-like shape. Do this quickly, as time is tight. |
| − | # | + | # Angle your body at a 45+ degree angle to the water. If possible, do this as you push off from the edge.<br> |
| − | # | + | # As you enter the water, lean your head forward and lift your legs up. You should enter the water smoothly with little splashing. |
| − | # | + | # Practice. This is essential, as nobody can perfectly execute a swan-dive first-time.<br> |
# [[Image:Swan Dive.jpg|left|400px]]<br> | # [[Image:Swan Dive.jpg|left|400px]]<br> | ||
{{clear}} | {{clear}} | ||
| Line 71: | Line 52: | ||
{{#widget:YouTube|id=yNTlhag-9XA}} | {{#widget:YouTube|id=yNTlhag-9XA}} | ||
| − | This is probably the first twisting dive a diver should learn...and performing it is great fun! | + | This is probably the first twisting dive a diver should learn... and performing it is great fun! |
#Walk to the end of the board, watch the water behind you (this is optional), and turn your back to the water. | #Walk to the end of the board, watch the water behind you (this is optional), and turn your back to the water. | ||
#Stand on the balls of your feet.[[File:Perform-a-Back-Dive-With-a-Half-Twist-Step-2.jpg|200px|center]] | #Stand on the balls of your feet.[[File:Perform-a-Back-Dive-With-a-Half-Twist-Step-2.jpg|200px|center]] | ||
| Line 79: | Line 60: | ||
#Once in the air, you have three options for your body position - tuck, where your knees are tucked tightly to your chest, pike, where your body is bent at the hips and forms an "L," and layout, where your body is completely straight. Layout is the easiest to twist, but it takes the most effort to complete the flip.[[File:Perform-a-Back-Dive-With-a-Half-Twist-Step-6.jpg|200px|center]] | #Once in the air, you have three options for your body position - tuck, where your knees are tucked tightly to your chest, pike, where your body is bent at the hips and forms an "L," and layout, where your body is completely straight. Layout is the easiest to twist, but it takes the most effort to complete the flip.[[File:Perform-a-Back-Dive-With-a-Half-Twist-Step-6.jpg|200px|center]] | ||
# Unless you are very comfortable with this dive, do not attempt to tuck or pike. For a layout, once you are in the air, tuck your chin to your chest and focus on pulling in your stomach muscles and straightening your back, helping your feet go over your head.[[File:Perform-a-Back-Dive-With-a-Half-Twist-Step-7.jpg|200px|center]] | # Unless you are very comfortable with this dive, do not attempt to tuck or pike. For a layout, once you are in the air, tuck your chin to your chest and focus on pulling in your stomach muscles and straightening your back, helping your feet go over your head.[[File:Perform-a-Back-Dive-With-a-Half-Twist-Step-7.jpg|200px|center]] | ||
| − | # | + | # When you are completely vertical, (but upside-down over the water,) you're ready to twist. If you are a lefty, snap your right arm down towards your left hip, keeping your left arm straight. As your arm turns, turn your hips. The turn will be completed. If you are a righty, snap your left arm down towards your right hip, keeping your right arm straight. As for lefties, your hips should turn with you arms and your turn will be completed.[[File:Perform-a-Back-Dive-With-a-Half-Twist-Step-8.jpg|200px|center]] |
| − | # | + | # You should now be facing forward. Make sure both arms are by your ears. You can untuck your chin now. Enter the water with your arms down, your toes pointed, and a big smile![[File:Perform-a-Back-Dive-With-a-Half-Twist-Step-9.jpg|200px|center]] |
#Finished.[[File:Perform-a-Back-Dive-With-a-Half-Twist-Intro.jpg|200px|center]] | #Finished.[[File:Perform-a-Back-Dive-With-a-Half-Twist-Intro.jpg|200px|center]] | ||
| Line 176: | Line 157: | ||
[[Category:Instructor Required|{{SUBPAGENAME}}]] | [[Category:Instructor Required|{{SUBPAGENAME}}]] | ||
<noinclude></noinclude> | <noinclude></noinclude> | ||
| − | + | {{CloseHonorPage}} | |
Revision as of 23:31, 24 May 2021
Skill Level
2
Year
1964
Version
10.02.2026
Approval authority
North American Division
For tips and instruction see Swimming - Beginner - Advanced.
1
1a
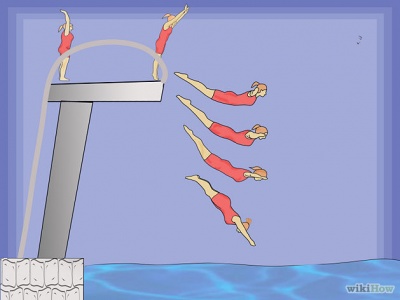
- Distance yourself. One step should do it. You need enough room to build up enough momentum, but if you run then you will probably slip.
- Check the depth of the pool. Only swan-dive in the deepest end reachable, as the swan-dive will take you very deep very quickly.
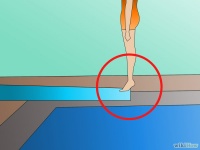
- Put your strongest leg forward. Your toes should be just hanging over the edge of the pool. Your other leg can be next to it or several inches behind, it depends on your preferences.
- Spread your arms to your side. This is essential for later.
- Push off from the side of the pool. Be sure to push slightly up, too. Snap your legs together tightly and lean forward when you do. Your body should be slightly bent.
- Force your arms forward so your body is in a pencil-like shape. Do this quickly, as time is tight.
- Angle your body at a 45+ degree angle to the water. If possible, do this as you push off from the edge.
- As you enter the water, lean your head forward and lift your legs up. You should enter the water smoothly with little splashing.
- Practice. This is essential, as nobody can perfectly execute a swan-dive first-time.
1b
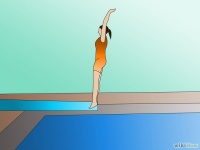
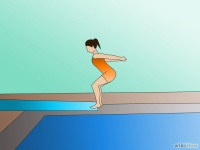
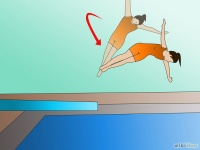
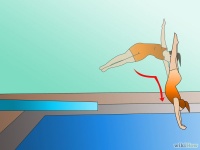
- First, take a few steps forward and jump.
- Bounce at the end of the board.
- Throw your arms forward and tuck your head to your chest.
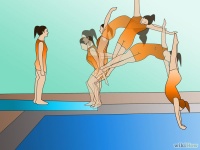
- During the somersault, tuck your arms and legs to your chest.
- You have to land the rotation on your feet or it could lead to a belly flop or a back flop.
1c
This is probably the first twisting dive a diver should learn... and performing it is great fun!
- Walk to the end of the board, watch the water behind you (this is optional), and turn your back to the water.
- Stand on the balls of your feet.
- The first times you try this dive, start with your arms straight above your head and close to your ears.
- Drop your arms to your sides while bending your knees.
- At the same time, swing your arms back up to your ears and push off the board. You don't want to jump straight up if you are on a recreational diving board, because then you will hit the board on your way down. If you are on a real diving board, then it works best if you jump straight up. However, you also don't want to jump straight back. Try jumping as high as you can in the air and about two to three feet back, depending on how tall you are.
- Once in the air, you have three options for your body position - tuck, where your knees are tucked tightly to your chest, pike, where your body is bent at the hips and forms an "L," and layout, where your body is completely straight. Layout is the easiest to twist, but it takes the most effort to complete the flip.
- Unless you are very comfortable with this dive, do not attempt to tuck or pike. For a layout, once you are in the air, tuck your chin to your chest and focus on pulling in your stomach muscles and straightening your back, helping your feet go over your head.
- When you are completely vertical, (but upside-down over the water,) you're ready to twist. If you are a lefty, snap your right arm down towards your left hip, keeping your left arm straight. As your arm turns, turn your hips. The turn will be completed. If you are a righty, snap your left arm down towards your right hip, keeping your right arm straight. As for lefties, your hips should turn with you arms and your turn will be completed.
- You should now be facing forward. Make sure both arms are by your ears. You can untuck your chin now. Enter the water with your arms down, your toes pointed, and a big smile!
- Finished.
Your stomach and back muscles play a bigger role in this dive than you think. Keeping them tight is essential to good form. Do not attempt a tucked or piked position in this dive unless you are very comfortable with the layout position. Source-under creative commons 3.0
2
2a
2b
2c
2d
2e
2f
3
Springboards are usually located either 1.0 or 3.0 metres (3 ft 3 in or 9 ft 10 in) above the water surface. It is very seldom that one is mounted at a height other than these two standard heights.
| Board Height | Pool Depth | Projection (NCAA) & |
|---|---|---|
| One meter | 2.5 meters | 1.5 meters |
| Three meter | 5 meters | 1.5 meters |
| A tower | 8 meters | 1.5 meters |
Historically springboards were made of wood. Modern springboards (since about 1960) are made out of a single-piece extrusion of aircraft-grade aluminum. The Maxiflex Model B, the board used in all major competitive diving events, is made out of such aluminum, and is heat treated for a yield strength of 50,000 psi. The slip-resistant surface of the board is created using an epoxy resin, finished with a laminate of flint silica and alumina in between the top coats of resin. This thermal-cured resin is aqua-colored to match the water of a clean pool.
In the test each candidate will announce the dive type and be judged accordingly.
Basis of Judging. Attention position for running dives: attention position on end or board for standing dives based on (a) approach, (b) spring, (c) way body is carried through the air, lay-out, tuck, or pike, (d) entry into water.
These lines are not numbered but are part of the official requirements. You will need an experienced diving instructor to judge the dives. Learning swimming and diving skills is best done with an instructor.
