AY Honors/Basic Sewing/Answer Key
1. Describe the proper use of the following:
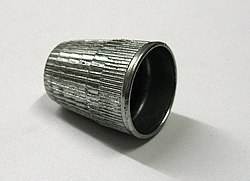
a. Thimble
A thimble is a protective shield worn on the finger or thumb. It is used for pushing a needle through a piece of fabric in situations where the pressure applied to the needle would otherwise cause the needle to pierce the skin. A thimble is most usually made from metal, but can also be found made from leather, rubber, wood, glass or china.
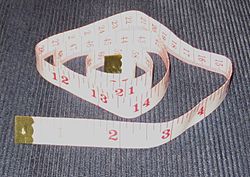
b. Tape measure
A cloth tape measure is used for measuring a person for the purpose of sizing a garment. It is also used to measure cloth.
c. Scissors and shears
Scissors are used for cutting cloth.
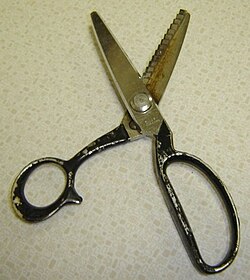
d. Pinking shears
Pinking shears are scissors whose blades are sawtooth instead of straight. Pinking shears will leave a zigzag pattern instead of a straight edge.
Pinking shears are useful for cutting woven cloth. Cloth edges that are unfinished will easily fray, the weave becoming undone and threads pull out easily. The sawtooth pattern does not prevent the fraying but limits the length of the frayed thread and thus limits damage.
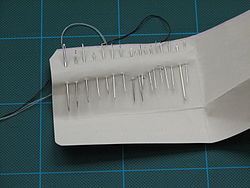
e. Needles of various sizes and types
Needles are used for piercing a fabric and passing a thread through it for the purpose of making a stitch. This can be done by hand or by machine. A hand needle has a hole in it (called the eye) near its back. A machine needle has its eye near the point.
2. Become acquainted with the sewing machine in your home or school. Identify:
a. Balance wheel
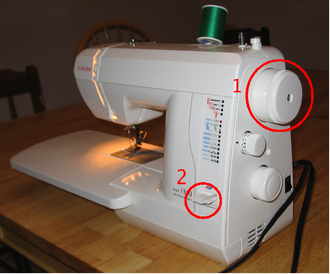
The balance wheel provides a method of manually moving the needle up or down. It is used to raise the needle out of the cloth when the stitch is finished, or to raise the thread take-up to make it accessible when threading the machine.
b. Thread take-up
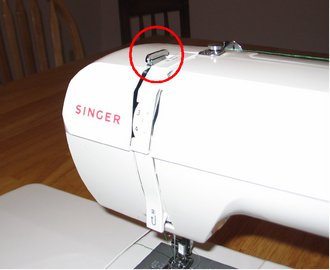
The thread take-up moves up and down with the needle, keeping the thread tight and drawing it from the spool as needed.
c. Presser foot
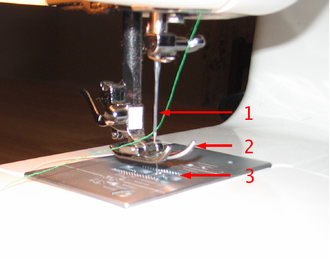
The presser foot holds the cloth in place while the needle runs thread through it. See the photo below for its location.
d. Presser foot lifter
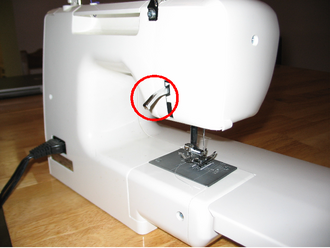
The presser foot lifter raises and lowers the presser foot. Raise it when you need to place a piece of cloth under the needle (and under the presser foot).
e. Needle
The needle stitches the thread (green in the photo) through the cloth.
f. Feed dogs
The feed dogs are little tread-like pieces beneath the presser foot. As the sewing machine is operated, the feed dogs advance the cloth forward (or backwards if the backspace lever is activated). The presser foot holds the cloth against the feed dogs so that they can move the cloth along.
g. Bobbin
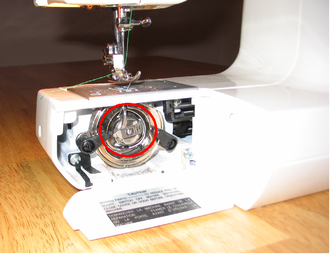
The bobbin supplies a second spool of thread. Between the bobbin and the needle, two pieces of thread are tied into a knot forming the stitch. The bobbin can be filled with thread by removing it from the position shown and placing it in a mechanism on the top of the sewing machine. It is usually filled with the same color thread as is thread through the needle. The bobbin's thread comes up from the bottom of the machine through a plate between the feed dogs.
h. Control
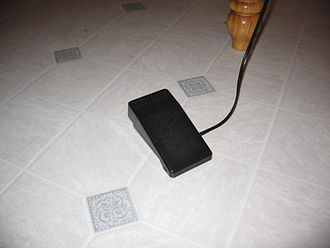
The control is a foot pedal that is similar to the gas pedal in a car. When it is fully depressed, the sewing machine operates at its maximum speed. When lightly depressed, the machine operates more slowly. When released, the sewing machine stops. Having a foot-operated control frees both hands for guiding the cloth through the machine.
i. Backspace lever
The backspace lever (shown in the photo with the balance wheel) reverses the direction that the feed dogs move the cloth. A stitch is often started an inch or so away from the back edge of the cloth with the backspace lever activated. When the stitch gets close to the back edge of the cloth, the lever is released and the cloth moves forward through the machine. Stiches are also ended this way. Doing this provides a stronger seam and locks the stitch in place.
3. Demonstrate how to properly thread and run the machine.
4. Put a hem in one of the following items showing neat and even stitches. a. Towel, b. Apron, c. Flannel baby blanket, d. Flannel lap blanket
To make a hem, it is best to visit the ironing board before doing any stitching. Fold the cloth over and press a crease where the seam will be. Then fold it over again and press another crease. This will tuck the loose edge of the fabric into the seam so that it will not be exposed, and that will prevent it from unraveling.
Pressing the seam first helps tremendously when stitching the hem, because it prevents the hem from creeping. Once the hem is creased, place the item on the sewing machine with the crease to the right. Lift the presser foot and slip the item beneath it. Line up the needle left-to-right so that it will place the stitch the desired distance from the edge of the hem. Line it up front-to-back so that the needle will pierce the cloth a half inch or so from the back edge of the hem. Then lower the presser foot. Hold down the backspace lever and gently press the foot pedal. As soon as the stitch reaches the back edge of the cloth, release the backspace lever, and the sewing machine will begin stitching in the forward direction. Going backwards first locks the stitch in place.
Gently guide the fabric into the sewing machine, paying careful attention to the edge. Sewing machines have lines etched into the surface beneath the needle for use as a guide. Try to guide the cloth using one of these guide lines to keep the stitch a constant distance from the edge of the hem. Don't try to go too fast. If you make a mistake, stop - you may need to remove the stitches and start over. It is far better to start over than to just keep sewing!
As the stitch nears the other end of the hem, slow down. Stitch all the way to the edge of the hem, and press the backspace lever just as you reach it. Stitch backwards for about a half inch, again to lock down the stitch. Then stop. Use the balance wheel to raise the needle out of the cloth. You may need to raise the needle to its highest point so that the thread on the underside is released. After the needle has been raised, lift the presser foot and slide the fabric out from under the needle. Cut the thread (there will be two - a top thread and a bottom thread), but leave at least three inches of thread coming out of the eye of the needle. Otherwise, the next attempt at making a stitch could easily unthread the needle.
Remove the cloth from the machine and cut the loose threads from the hem. Ta da! You should now have a nice hem, and the machine should be ready to stitch another!
5. Demonstrate your ability to properly sew on buttons and snaps.
6. Tell what is meant by selvage, bias, and grain of fabric.
- Selvage
- the edge of a piece of fabric, specially woven to resist unraveling.
- Bias
- is a line that would go from corner to corner on a square piece of fabric. The bias of a fabric is very stretchy, crossing the fabric's threads at a 45° angle.
- Grain of Fabric
- is the internal lay of the fabric - that is how the threads from which the fabric is woven are arranged. The lengthwise grain is parallel to the selvage, and the crosswise grain is perpendicular to the selvage.
