AY Honors/Metal Craft/Answer Key
1. Name the various metals that can be used in metal craft.
Metals suitable for use in metal craft include:
- Tin
- Aluminum
- Copper
- Galvanized steel (duct work)
- Brass (an alloy of copper and zinc)
- Bronze (an alloy of copper and tin)
- Silver and gold (especially in foil form)
2. Complete one project using metal foil tooling. Complete the project by antiquing and framing.
Metal foil tooling is done by placing a piece of foil on top of a soft but firm surface and then making impressions with a stylus. The work surface can be a piece of scrap linoleum, leather, or crafting foam. The stylus is often a small wooden stick with a point on it, but you can also use a ballpoint pen or a pencil. A dowel about the same diameter as a pencil can be sharpened with a pencil sharpener to make an effective stylus.
The metal crafter can place a drawing on top of the foil and trace it with the stylus, or draw the design free hand. Once the image has been impressed in the foil, it can be placed in a frame. You can use something as elaborate as a picture frame, or as simple as craft sticks glued together.
Low cost kits are available with all the necessary materials at craft stores, hobby shops, and online retailers.
3. Complete one project using metal punch.
A punch is a hard metal rod with a shaped tip at one end and a blunt butt end at the other that is usually struck by a hammer. A variety of punches are used in engineering, but often the purpose is to form an impression of the tip on a workpiece. You can also use a nail set, a pick, or even a nail (though a nail will make squarish holes) instead of a punch.
Draw out your design on a piece of paper. It should be a simple line drawing with no shading. Then draw dots on the lines indicating where you will punch a hole. Fasten the drawing to a piece of sheet metal with tape. The sheet metal can be copper, tin, or aluminum (such as flashing), all of which are generally available at home improvement centers and hardware stores.
Place a piece of scrap plywood on your work surface to protect it, and then place a piece of scrap linoleum on top of that. Your piece of sheet metal goes on top of the linoleum.
Carefully place the tip of the punch on one of the dots in your drawing and strike the butt end of the punch sharply with a hammer. It should take only one blow. Then move the punch to the next dot and repeat until you have punch a hole (or merely made an indention) on every dot in your drawing. Remove the paper and admire your work.
Punched panels are often used to decorate the doors of a pie safe.
4. Complete one project using drilling, riveting, and bending of metal such as a simple candle holder.
5. Demonstrate properly the use of the following:
a. Tin Snips
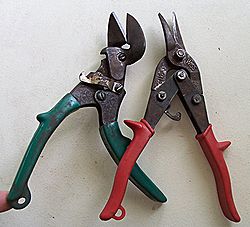
Tin snips are tools used to cut thin sheet metal. They use the same principles as common scissors, but are able to handle thicker and harder material. There are three different types of tin snips; straight cutting, left cutting, and right cutting. Straight cutting in a straight line, left cutting snips (usually red) will cut in a curve to the left, and right cutting snips (usually green) will cut in a curve to the right.
In practical use the red snips pictured will be used in the right hand, for straight or curving cuts, with the base material to the right being cut neatly and the left hand will be pulling away a spiraling offcut. The green snips work in the opposite fashion in the left hand, with the waste being on the right.
b. Pop rivet
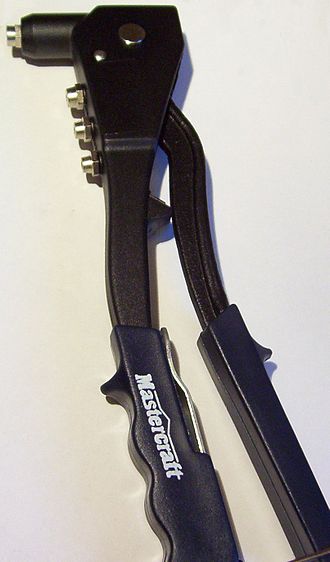
Pop rivets are made from flared aluminum tubes and a stem (or mandrel) through the center. The stem has a small ball at the end which has a diameter great than that of tube. The rivet assembly is inserted into a hole drilled through the parts to be joined and a specially pop riveting tool is used to draw the mandrel into the rivet. The ball at the end of the mandrel expands the end of the rivet and the mandrel snaps.
The rivet is placed in a pre-drilled hole and is set by pulling the mandrel head into the rivet body, expanding the rivet body and causing it to flare against the reverse side. As the head of the mandrel reaches the face of the blind side material, the pulling force is resisted, and at a predetermined force, the mandrel will snap at the break point of the mandrel.
To set a pop rivet, insert the stem into the nozzle of the riveting tool, then place the rivet's tube into a pre-drilled hole. Position the river such that the flared portion is held firmly against the surface of piece to be riveted, and squeeze the handles together. You should be able to squeeze them until the rivet "pops", or the handles have traveled their full distance. If that happens, release the handle and squeeze again. The tool will grip the stem in a different place. You may need to repeat this a few times until the rivet pops. After it pops, release the handle, and let the stem slide out of the tool's nozzle. A successful rivet joint depends on maintaining contact between the rivet's flared face and the material being riveted.


