AY Honors/Camping Skills III/Answer Key
1. Be at least in the 7th grade.
Camping Skills III has been designed so that it is within the capabilities of Pathfinders who are in grade 7 or higher.
2. Review six points in the selection of a good campsite. Review the safety rules of firebuilding.
Campsite Selection
Adventist Youth Honors Answer Book/Camping/Choosing a campsite
Fire Safety
Adventist Youth Honors Answer Book/Camping/Fire/Fire safety
3. Go on a weekend campout.
Adventist Youth Honors Answer Book/Camping/Participate in a weekend campout
4. Lay the following three fires and tell their uses:
a. Hunter's fire
Adventist Youth Honors Answer Book/Camping/Fire/Hunters
b. Reflector fire
Adventist Youth Honors Answer Book/Camping/Fire/Reflector
c. Star fire
Adventist Youth Honors Answer Book/Camping/Fire/Star
5. Know six ways to start a fire without a match. Build a campfire using one of these:
a. Compressed air
Adventist Youth Honors Answer Book/Camping/Fire/Compressed air
b. Curved glass
Adventist Youth Honors Answer Book/Camping/Fire/Curved glass
c. Flint
Adventist Youth Honors Answer Book/Camping/Fire/Flint and steel
d. Friction
Adventist Youth Honors Answer Book/Camping/Fire/Friction
e. Metal match
Adventist Youth Honors Answer Book/Camping/Fire/Metal match
f. Spark
Adventist Youth Honors Answer Book/Camping/Fire/Electric spark
6. Know how to properly sharpen a hatchet and knife.
A tool can be sharpened with a whetstone. Most whetstones need to be kept wet when they are in use - some are wet with water and others are wet with oil. Stones with finer grain typically use oil, but you can use water on them as well. The purpose of wetting a whetstone is to allow the steel removed from the blade to float away. The finer the stone, the finer the edge it will make on a tool, but the longer it will take to sharpen it. For this reason, a very dull tool should be sharpened first with a coarser stone, and then with a finer stone. Then it should be kept sharp. You can keep a blade sharp by respecting it - do not chop into the ground with a hatchet, and to not stick a knife blade in the ground either. Dirt is highly abrasive, and a rock will ding the edge very quickly. Close a pocket knife when you are finished using it, and do not allow the business end of a blade to touch anything other than the things you are trying to cut with it.
Hatchet
It is tempting to take a dull hatchet to a power grinder, but unless you are very careful, this could be a huge mistake. A grinder will not only remove steel from a blade, it will also heat it. It is very easy to heat it too much, causing the steel to lose its temper (tempered steel is hard and holds an edge better than untempered steel). Steel is tempered by heating it to the point that it becomes non-magnetic, then quickly cooling it. If it is allowed to cool slowly, the iron crystals in the blade will align themselves with the Earth's magnetic field as they cool, and aligned crystals make for soft steel. So the first advice we can give on sharpening a hatchet is to stay away from the grinder.
Instead, use a file or a stone. Hold the file so that it passes over the edge of the blade, but at a steep angle. Sharpen one side, and then the other.
Knife
To sharpen a knife, hold the blade at about a 15° angle and scrape it along a whetstone as if you were trying to shave off a thin layer of the stone. Be sure to sharpen both sides.
7. Cook a one-pot meal using fresh or dried food.
Adventist Youth Honors Answer Book/Camping/One-pot meal
8. Describe the various types of tents and their uses.
Adventist Youth Honors Answer Book/Camping/Tent/Styles
Different types of tents are used for different purposes. A 4 season tent is going to do well for any type of conditions, where as other types of tents (most today are 3 season) don't do as well in all seasons (usually the winter season is not a good time to use such a tent). So, seasons are one way of signifying different types of tents.
The different types of camping would be another way to distinguish the types of tents. A family tent is more than likely going to be heavy (weight wise) and bulky. It will often have lots of room (can fit 6 people). A backpacking tent is small and light weight. Usually you won't put gear in a backpacking tent (you hang your pack or keep it out of your tent). A backpacking tent will fit people snuggly (usually no more than 2 per tent). A mountaineering tent can stand the rough climate and terrain in addition to being light weight. Mountaineering tents are designed for some gear to fit inside the tent (thus being a little bit more spacious than backpacking tents). Mountaineering tents may also allow for up to 3 or four people to sleep snuggly in a single tent.
The final way to classify tents by different types is by material used. I don't use this method for teaching camping skills 3 though. Tents may be classified by the materials used to build them (like aluminum poles vs carbon fiber poles, etc.).
9. How does condensation occur in tents, and how can it be prevented?
Each breath a person exhales contains water because of the moisture content of the lungs, throat, mouth and nasal cavity. This moisture rises until it comes in contact with a cool surface such as the inside of the tent, where it condenses.
A good tent will be made of breathable material that allows the moisture to pass through (such as a nylon mesh), and there will be a rain fly on the outside to keep rain out of the tent. Water vapor passes through the mesh and condenses on the fly. It then runs off the underside of the fly and drips off the edge outside the tent.
10. Demonstrate your ability to anchor a tent down, using the taut-line hitch and two half hitches.
Taut-Line Hitch
Adventist Youth Honors Answer Book/Knot/Taut-line hitch
Two Half Hitches
Adventist Youth Honors Answer Book/Knot/Two half hitches
11. While camping, plan and give a ten-minute devotional or organize and lead a nature or Bible game or lead out in Sabbath School, camp church, or camp vespers.
- This is your activity.
12. Properly locate and build one of the following and describe its importance to the individual and the environment:
You should take into consideration where your sleeping area(s) are in relation to these water-related areas. Specifically, water flows downhill, so, you do not want water runoff from the 'sink and dishwashing' or 'shower water' flowing to your sleeping area(s).
Also, the location of the 'latrine' should be considered depending on where you get your water source. For example, you do not want to put the 'latrine' upstream and take your shower and wash your dishes downstream. But pay attention! Just because your latrine is downstream and downhill from you does not mean it is downstream and downhill from other campers. Be considerate. A latrine should never be located within 60 meters![]() of any water supply.
of any water supply.
a. Camp sink and dishwashing area
Adventist Youth Honors Answer Book/Camping/CampSink
b. Latrine
Adventist Youth Honors Answer Book/Camping/Latrine
c. Shower
Adventist Youth Honors Answer Book/Camping/CampShower
13. Demonstrate four basic lashings and construct a simple object using these lashings.
Adventist Youth Honors Answer Book/Lashing/Square
Adventist Youth Honors Answer Book/Lashing/Diagonal
Adventist Youth Honors Answer Book/Lashing/Sheer
Adventist Youth Honors Answer Book/Lashing/Continuous
Adventist Youth Honors Answer Book/Lashing/Simple Object
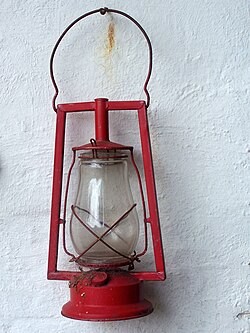
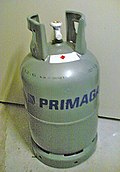
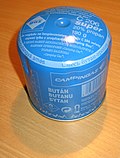
14. Know how to replace the mantels on a camp lantern. Demonstrate how to refill gas in a camp lantern and stove. Know how to maintain the pressure pump on a camp stove in good working order.
Replace Mantel on Camp Lantern
- As with most things, practice and repetition makes a task simple.
- Turn OFF the gas valve completely.
- Remove the lantern cover and the glass covering. Place these in a safe and stable place.
- Remove any remains of the old mantel. Do this carefully if the lantern is still HOT.
- Tie the new mantel in place on the gas pipe. There is a string around the collar that slips over the gas pipe.
- Pressurize the gas tank.
- Hold a lighted match near the mantel. The mantel should begin to burn. Do not turn on the gas. If your lantern has an electronic ignition, it is still better to use a match when lighting a new mantel for the first time, as the ignition can cause the mantel to break.
- Replace the glass cover and the lantern cover.
- Slowly open the gas valve when the mantel starts to glow brightly.
The mantle is a roughly pear-shaped ramie-based artificial silk or rayon fabric bag made from silk or fabric impregnated with rare-earth metallic salts that will convert to solid oxides after being heated in a flame. A mantle will glow brightly in the visible spectrum while emitting little infrared radiation. The rare earth oxides (cerium) and actinide (thorium) in the mantle have a low emissivity in the infrared (in comparison with an ideal black body) but have high emissivity in the visible spectrum. There is also some evidence that the emission is enhanced by candoluminescence, the emission of light from the combustion products before they reach thermal equilibrium. The combination of these properties yields a mantle that, when heated by a kerosene or liquified petroleum gas flame, emits intense radiation that is mostly visible light, with relatively little energy in the unwanted infrared, increasing the luminous efficiency.
The mantle aids the combustion process by keeping the flame small and contained inside itself at higher fuel flow rates than in a simple lamp. This concentration of combustion inside the mantle improves the transfer of heat from the flame to the mantle. The mantle shrinks after all the fabric material has burnt away and becomes very fragile after this first use.
Demonstrate refilling gas in a Lantern and Stove
- Be sure not to spill any fuel, or if you do, make sure you clean up properly.
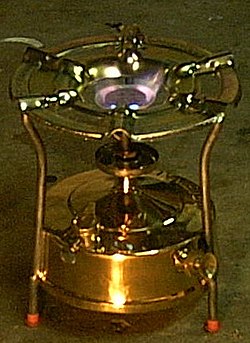
Maintain Pressure Pump on a Camp Stove
- Most stoves can use either liquid or gas fuel. Gas-fuel stoves are simpler to operate than liquid fueled stoves. The gas, being already pressurized, flows from the fuel canister into the burner, where it ignites, in the same manner as a domestic kitchen stove.
- Liquid-fuel stoves are more complex because the liquid fuel must be vaporized prior to burning. To accomplish this, the stove design brings the fuel line containing the liquid fuel near the flame of the burner. The heat from the flames converts the liquid fuel to a gas before it reaches the burner, where it mixes with air and is ignited. Some models use a spray system which does not require preheating.
- Most stoves operating with liquid fuels must be heated or primed before the burner is turned on. Many stoves require the operator to open the fuel valve briefly without igniting the fuel, so that it flows into a small pan. This small quantity of fuel is then lit and allowed to burn down. When the fuel valve is opened again, the fuel vaporizes from the heat of the pan. Some stoves do not have this apparatus, and must be preheated by the application of an external heat source such as a solid fuel block.
- In many stoves, the priming pressure is generated by a small hand pump that forces air into the fuel container. As the fuel is consumed, the pressure decreases according to Boyle's Law, so the pump must be operated occasionally during use to maintain steady stove operation.
- In the picture (above/right), the pressure pump knob is also the cover to the fuel tank. This MUST fit on the tank properly. If this cover is not correctly fitted, you cannot pressurize the stove. You would pressurize the tank by operating the pump several times before lighting the stove. During the course of use, you will need to operate the pump again, to maintain the pressure in the tank.
Note: The tent color for Camping Skills #3 is green.
Adventist Youth Honors Answer Book/Camping/Colors


