Difference between revisions of "AY Honors/Bookbinding/Answer Key/es"
(Created page with "</noinclude> ==Nota histórica== La especialidad de Encuadernación fue introducida en 1935 y descontinuada en 1951. Fue reintroducida como una «especialidad de antigüedad»...") |
(Created page with "</noinclude> <!-- 5. Definir la diferencia de gramaje del papel en relación con una resma de papel. -->") |
||
| Line 223: | Line 223: | ||
</div> | </div> | ||
| − | + | {{clear}} | |
| − | |||
| − | |||
<noinclude></noinclude> | <noinclude></noinclude> | ||
Revision as of 23:22, 18 May 2021
Nivel de destreza
3
Año
1935
Version
06.02.2026
Autoridad de aprobación
Asociación General
1
1a
1b
1c
1d
1e
1f
1g
1h
1i
1j
1k
1l
1m
1n
2
2a
2b
2c
2d
2e
3
3a
3b
3c
3d
4
4a
4b
4c
4d
4e
4f
4g
5
6
6a
6b
6c
7
7a
7b
7c
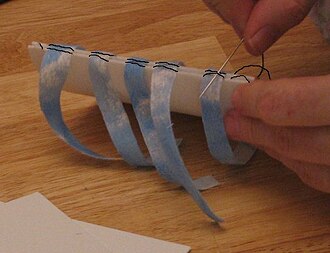
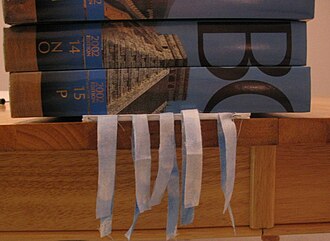
If you use weights to compress the signatures, be careful not to glue the weights to the book's pages. The idea is to squeeze the pages together as tight as possible while the glue sets.
If you use wooden boards and C-clamps, sandwich the pages between the two boards and clamp them together with the C-clamps.
If using a shop vise, be sure to pad the vise's jaws so you do not damage the pages. The glue will strengthen the spine and adhere the threads to the pages.
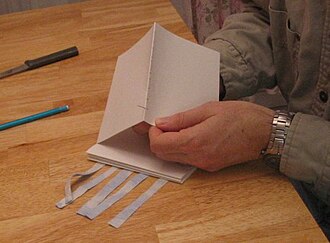
The finished product from this stage is called a text block.
7d
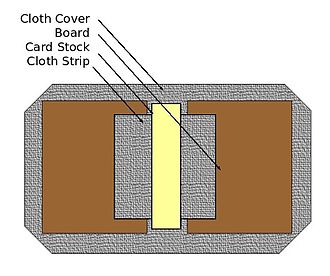
Next, get some heavy cloth or heavy paper - whatever you want to use as the outside surface of the book cover. The remainder of this discussion assumes a cloth cover. Lay the boards on the cloth with a gap between them. The width of this gap should be equal to the width of the text block's spine plus triple the thickness of the boards (three eighths of an inch). Mark the cloth around the boards leaving about a one-inch border. Cut the cloth, and then clip the corners to within a quarter inch of the corners of the boards:
Coat the outside surface of the boards with a thin, even layer of glue, lay them on the cloth, and stretch the cloth smooth. Be sure the gap between the boards is as wide as the text block's spine plus three times the thickness of the boards. Glue a strip of cloth across the spine, bridging the two boards. You may also glue a piece of card stock on top of this strip of cloth to further strengthen the spine. If you do not have card stock, a manila folder or an index card can be pressed into service instead. This strip of card stock should be as long as the text block's spine. Be careful not to glue the cover to your worktable. Ideally, you do not want any of the glue to penetrate the cloth cover, but just in case, you may wish to place a large piece of plastic beneath the cloth when doing this (use the lid from a large plastic storage tub, a plastic bag, or cellophane wrap). Now place as much weight on the boards as you can muster and leave it there until the glue dries.
Attach the Covers
When the glue dries from the previous step, remove it from the press (or remove the weights from the cover) and apply another thin layer of glue to the inside of the book cover. Then fold the top of the cloth cover over and glue it in place. Do the same for the bottom, and then fold over the left and right sides.
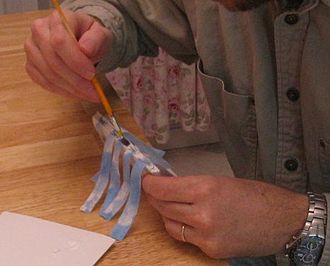
Get some wax paper or some plastic and insert two layers of it beneath the first page of the text block. Apply a thin layer of glue around the edge of the paper using a small paint brush. It's OK to brush the glue onto the wax paper. Cover all four edges of the text block, and then add a little more glue to hold down the tapes. Spread out some more wax paper and turn the text block over onto it. Repeat the processes for the back of the book, adding glue to the edges of the page. When you have coated the edges of the back page with glue, remove the layer of waxpaper that the glue was brushed onto, but leave the first layer of waxpaper in place. This layer will prevent the glue from bonding to the next page and keep moisture out of the rest of the book.
Now carefully lift the text block and place it on the back cover. Be sure to center it well. If you misalign it, carefully lift it off and make another attempt. Now fold the front cover closed onto the front page and make sure the text block is well centered. Finally, place the book back in the press again (or under a heavy weight) and shape the spine as best you can. Then let the glue dry. Don't be impatient at this point. If the book still smells like glue when you're ready to remove it, it is still too soon, and removing it will cause the pages to wrinkle and curl.
7e
Nota histórica
La especialidad de Encuadernación fue introducida en 1935 y descontinuada en 1951. Fue reintroducida como una «especialidad de antigüedad» en 1986. Fue revisada y regresada a la categoría Vocacional en 2002.
