AY Honors/Maple Sugar - Advanced/Answer Key
1
For tips and instruction see Maple Sugar.
2
The first step will be finding a suitable maple tree. The tree should be at least 10 inches in diameter. For every extra foot of diameter, you can drill another tap. A brace and bit is the traditional tool for tapping the tree, but you could also use a cordless drill, or if you can reach the tree with an extension cord, a power drill. Whichever tool you choose for boring the tap hole, be sure to use either a 7/16" or a 1/2" bit. The hole should be about 2.5" deep, and angled such that the sap can run downhill out of the tap.
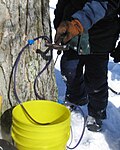
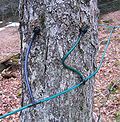
Once the hole has been bored, lightly tap the tap into place (perhaps that's why it's called a tap). There are several types of taps that you can use. A tap could be made by boring a hole in a round chunk of wood, and carving a notch in it to receive the bucket handle, or it could be any of several commercially available varieties. Some are designed to hold a bucket, and others are designed to connect to plastic tubing. If you can manage it, plastic tubing is a lot easier because multiple taps can be drained into a common container. This reduces the amount of labor involved, but it also requires that the tapped trees be located on a hillside so the sap will flow into the container, or it requires a pump (which requires power). Power is sometimes difficult to come by in the woods.
Once the tap is in place, the sap needs to be directed into a container. This is either a bucket hung directly on the tap, or some sort of container into which the tubing is routed. The bucket should then be covered to keep out the rain and debris.
A good tree can produce a gallon of sap per day, so once you've tapped the trees, you need to keep an eye on them. Empty the buckets into a larger container until you have at least 15-20 gallons of sap (that's how much you'll need to make 2 quarts of syrup). When you have enough sap, pour it into an evaporator. An evaporator is a large shallow pan (typically 36"x24"x6") situated over a fire. The fire is often built in a steel drum which has been adapted to this use (see photo). This process will take several hours, so you'll need to wait until you have an entire day to dedicate to the task. The labor intensive portion of this task is to keep the fire stoked. Once the sap has been reduced by a factor or 30-40, it can be transferred to jugs for storage.
3
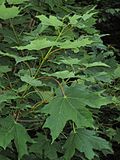
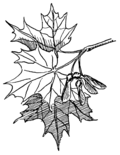
The leaves of the maple tree are fairly distinct and easy to identify. Indeed, the maple leaf is the central motif of the Flag of Canada.
Unfortunately, collecting a maple leaf is generally not something that can be done when the sap is running. Maples drop their leaves in the fall. The first signs of green made by a maple tree in spring is when it flowers. The leaves come a little later. The bark, of course, presents no such problem, as it can be collected any time during the year.
4
Maple wood makes good firewood. Maple wood has been used for lumber and especially for making flooring, wagons, and buildings. Furniture is its most important use. The beauty of the tree adds to the beauty of our out-of-doors. It also provides shade and cooling in the summer.
5
Healthy trees, at least 10” in diameter with many branches. Tapping is best done on the east and south sides of trees where the sun warms it in the mornings and early afternoons.
6
When warm days are above freezing and nights are below.
7
There are approximately 19 varieties of maple trees. Some that produce sweet sap are:
- Sugar maple (Acer saccharum) - also known as hard maple or rock maple.
- Silver maple (Acer saccarinum)
- Red maple (Acer rubrum) - the second heaviest producer of syrup.
- Black maple (Acer nigrum)
- Ashed leaf (box elder) maple (Acer negundo)
An additional ornamental maple tree that also produces good syrup is:
- Norway maple (Acer platanoides) - stems exude a milky fluid when squeezed or when leaves plucked.
8
Use a 7/16 or 1/2 inch bit to drill for the spigots. I would recommend the 7/16 inch size.
9
It may spoil if the sap is not kept cool or if it is kept too long before boiling it down. Spoiled sap has a slightly milky appearance. If boiled down it has a very dark appearance.
10
One story is that an Indian warrior threw his tomahawk into a maple tree on a spring morning and “sweet juice” began to flow down his tomahawk, and he caught it in his hand and drank it and found it good.
Another story is of an Indian maiden who left her pottery jar at the base of a maple tree. When she returned, her pottery jar was filled with sap due to a crack in the tree.
Most likely though is that the Indians observed insects at the sap and tried it for that reason.
11
It takes 30 - 40 quarts of sap to make one quart of syrup.
12
When boiling is started the sap looks like boiling water. As the water is boiled off the color gets darker slowly. As the sap gets close to the syrup point the bubbles get smaller. At this point the syrup tends to rise
up and boil over.
Another indication is the consistency. At the syrup stage, the liquid comes off a spatula in small gooey sheets rather than drops.
With a candy thermometer, the syrup is ready when the temperature is 7° F. above the boiling point of water at your elevation. (The boiling point of water drops 1° F. for every 550 feet increase in elevation above sea level.)
13
Maple sugaring was introduced to the early settlers by the North American Indians.
14
Though some sugar houses include tours of their operation, they may charge for this. If this is not a concern, go ahead and make arrangements. If you ask nicely, or if you know someone who makes syrup on a small scale, you may be able to get a tour for free (especially if your group is willing to pitch in for a half day to keep the fires going or help collect the sap).
15
| Hominy Grits | |
|---|---|
| Ingredients | Procedure |
|
Grits may be sweetened with honey, brown sugar, maple syrup, or jelly. Grits can also be flavored with cheese, sunnyside up egg, or vegetarian sausage. Serve while hot. Recipe adapted from Effigy Mounds National Monument.
|
| Butternut Squash | |
|---|---|
| Ingredients | Procedure |
|
|
| Hot Apple Cider | |
|---|---|
| Ingredients | Procedure |
|
Pour the apple juice and maple syrup into a large pan. Place the cloves, cinnamon sticks, allspice, and citrus peelings on the center of a piece of cheesecloth. Bundle it up and tie it up with a piece of string. Place the bundle in the apple juice and cook for 5 to 10 minutes over moderate heat - do not let it boil. Turn off the heat (or turn it way down) and discard the spice bundle. Ladle the cider into mugs and if desired, put another cinnamon stick in each cup.
|
16
If you continue boiling the syrup until the temperature reaches 30o to 33o F. above the boiling point of water (e.g. 241o to 244o F. in Michigan) and then stir the syrup vigorously it will start to crystallize. At this point you put it into whatever molds or containers you wish before it hardens too much in the pan.
17
It is made by pouring hot syrup onto snow. As it cools it makes a delicious treat.
18
Time to quit for the year. The sap will produce a dark syrup of a low grade.
